The Screen That Would Not Break: An Animated Autopsy of USS Laffey on Picket Station One
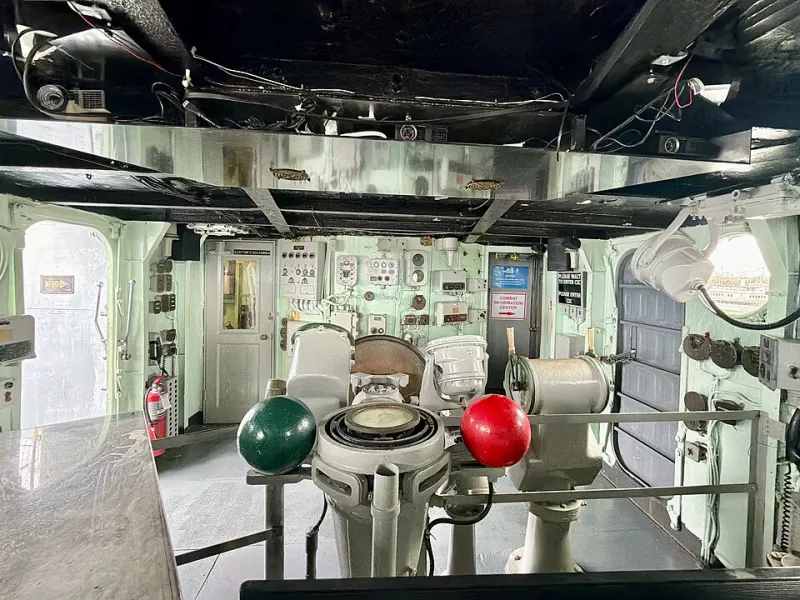
Photo: Oleg Yunakov, CC BY-SA 4.0, via Wikimedia Commons
On 16 April 1945, USS Laffey (DD-724) was not where most Hollywood versions of the Pacific War would put a destroyer. She was alone on radar picket station No. 1, a patch of ocean north of Okinawa, waiting for the next Japanese air raid to appear on a scope. Around her, the fleet’s main body was supporting the campaign ashore. Laffey’s job was to see the raid first, call it in, and — if necessary — absorb it.
That assignment explains why the ship’s 80-minute ordeal is more than a survival story. It is a system story. The picket line was a distributed warning network made of destroyers, support craft, radar, radios, and fighter-direction teams. In an animated reconstruction, the value of Laffey’s fight becomes visible not only in burning aircraft and near misses but in the geometry of the line itself: a thin arc of ships placed between the fleet and the incoming threat.
A Destroyer Posted at the Edge
Laffey was an Allen M. Sumner-class destroyer, built at Bath Iron Works in Maine and named for a sailor who had received the Medal of Honor for heroism in the First World War. By April 1945 she was a veteran of the Pacific, with a crew accustomed to the routines of screening and shore bombardment. Radar picket duty was different. It demanded that a single ship serve as a sensor, a communications relay, and a tripwire.
The picket stations around Okinawa were numbered and spaced to give the fleet time. Japanese aircraft approaching from the north or northwest would ideally be detected by a picket destroyer’s radar before they reached the transport areas and carrier groups. The destroyer would report the raid, help vector combat air patrol fighters toward it, and then fight with its own guns as the attack closed. The system worked only if the picket ships stayed on station long enough to pass the warning.
That made the picket line both a shield and a sacrifice. The ships were not expected to defeat every raid alone. They were expected to buy minutes — minutes that let the fleet go to general quarters, disperse, launch fighters, and prepare defenses.
What the Picket Line Was For
Animated diagrams are especially useful here because the picket line was a geography problem. A map that shows only the main fleet can make the destroyers look like isolated victims. A map that shows the warning chain makes them look like the outer edge of a defense in depth.
When Laffey’s radar and lookouts picked up incoming aircraft, the ship’s combat information center became a small command post. Radarmen, talkers, and fighter-direction officers passed bearings, ranges, and raid estimates over voice radio. The information traveled back to the fleet and to fighter controllers. Every report had to be short, accurate, and timely. A late report was nearly as useless as no report.
Then came the visual fight. Kamikaze attacks demanded that gun crews engage aircraft that were often diving, weaving, or approaching from several directions at once. Laffey’s 5-inch guns, 40mm mounts, and 20mm batteries were designed for layered defense, but no destroyer could cover every bearing. The ship’s gunners had to choose targets while the bridge conned the ship to dodge, and the engineering plant kept power and steering alive.
Eighty Minutes as a Sequence of Choices
The popular phrase for Laffey — the ship that would not die — is memorable, but animation can show that survival was not a single act of will. It was a sequence of small decisions under pressure.
A bomb hit could start a fire near a handling room. A near miss could spring plates and flood a compartment. A kamikaze strike could knock out a gun mount, cut communications, or jam a rudder. Each event forced a new decision: plug the hole, fight the fire, reroute power, shift steering control, move ammunition, or keep firing with fewer mounts.
Damage-control parties moved through smoke and water to shore up bulkheads and close fittings. Repair crews worked in compartments that were hot, dark, and noisy. The ship’s commanding officer, Cmdr. F. Julian Becton, had to keep the ship maneuverable enough to present a harder target while keeping enough guns in action to matter. The crew’s performance was not abstract courage. It was trained procedure executed under conditions that made every procedure harder.
An animated autopsy can slow those minutes down. It can show a hit, then trace the consequences through adjacent compartments. It can show why a flooded space changed the ship’s trim, or why a lost mount changed the firing geometry. That kind of reconstruction turns a legendary nickname into an explainable outcome.
Damage Control as Narrative
Most combat films treat damage control as background noise. In the Pacific War, it was often the difference between a ship that survived and a ship that did not. Laffey’s ordeal is a case study in how American destroyers were built and manned for survivability.
Compartmentation, portable pumps, hoses, and trained repair parties mattered. So did the crew’s ability to improvise without losing discipline. The ship absorbed multiple bomb and kamikaze hits, suffered heavy casualties, and remained afloat. That outcome was not inevitable. It depended on men knowing where the valves were, how to patch a bulkhead, and how to keep a generator or steering motor running when the normal arrangement had failed.
For an animated-history audience, this is where the drama should live. The explosions are the visible event. The invisible event is the repair party closing a hatch, the engineer shifting power, or the gun captain keeping a mount in local control after the director is lost.
Why Animation Helps
Laffey’s fight is difficult to tell well with still photographs. The action came from many directions and unfolded over more than an hour. A minute-by-minute animation can alternate between an overhead view of the picket station, a ship diagram showing hits and flooding, and a pilot’s-eye approach toward the destroyer. It can show the difference between a near miss that damages a hull and a hit that starts a fire.
That approach also keeps the story honest. It avoids turning the picket line into a simple tale of doomed heroism. The destroyers were exposed, but they were not passive. They were part of a system that included radar, radios, fighters, anti-aircraft guns, and repair parties. Laffey held because that system held long enough — and because her crew kept the ship fighting after the system had been badly hurt.
The Line Held, and What That Means
By the time Laffey’s ordeal ended, the ship had been mauled but not sunk. The fleet had received warnings. The picket line had done what it was designed to do, at a cost the crew knew was possible when the destroyer took station.
That is the useful lesson for a modern audience. The radar picket line off Okinawa was not a sideshow to the main battle. It was the battle’s outer nervous system. Laffey’s 80 minutes show how a small ship could function as a sensor, a shield, and a survival machine at the same time. Animation can make that architecture visible — and make the crew’s work legible as something more than legend.